
Forces War Records Help Center
Viewing Documents
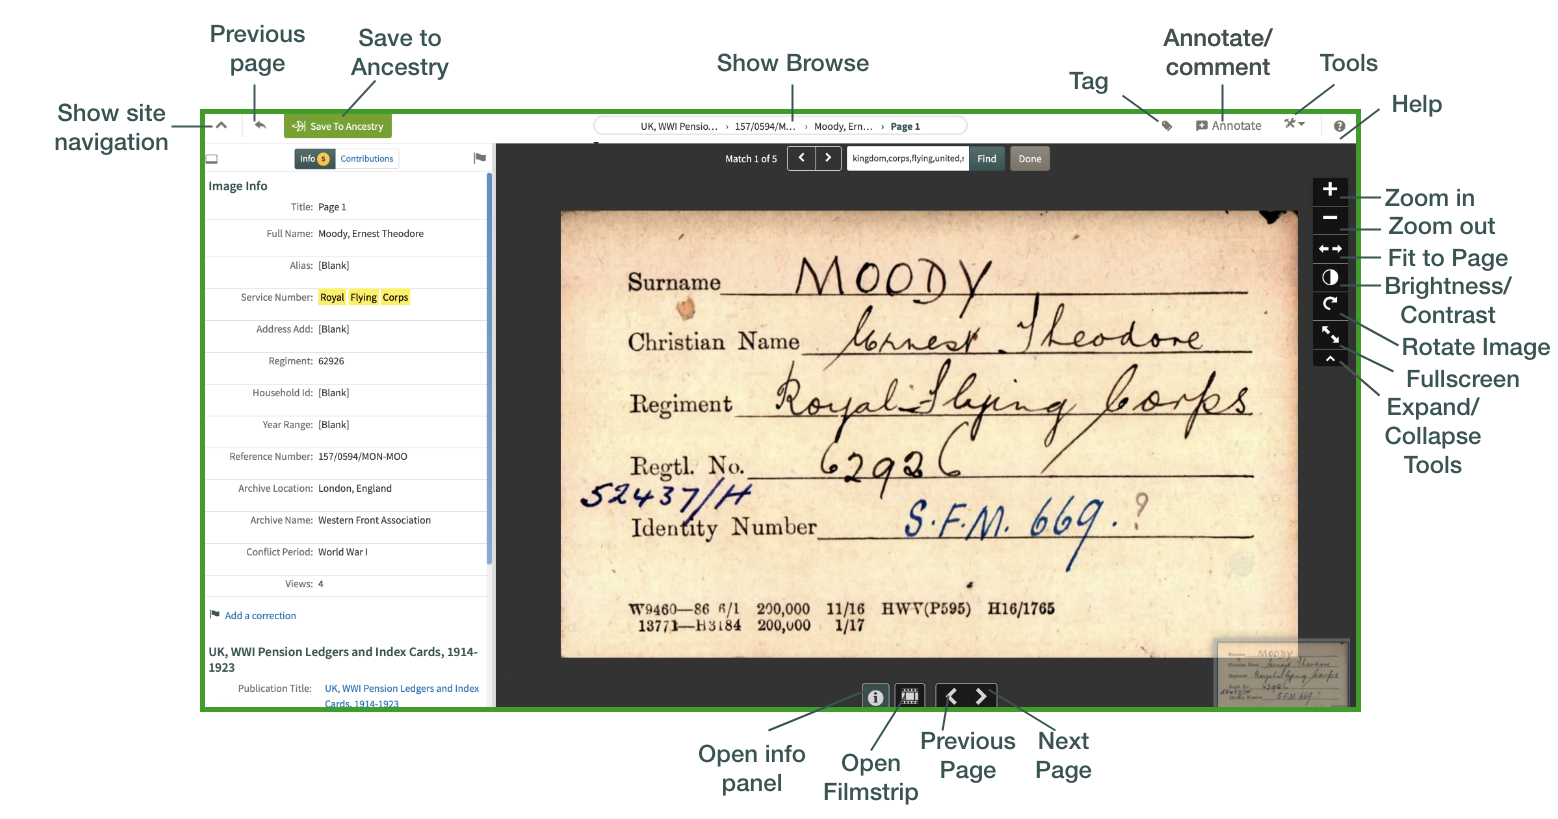
Forces War Records has a powerful tool for viewing documents that allows you to explore records closely and in detail. Built-in features allow you to tag, download, print, and add records to Forces War Records Memorials for your ancestors. You can also annotate records, share, and save records to Ancestry®. Here are some of the key features:
How to Tag
· Click on the “Actions” tab and select “Tag.”
· Add a new Tag or select from existing Tags.
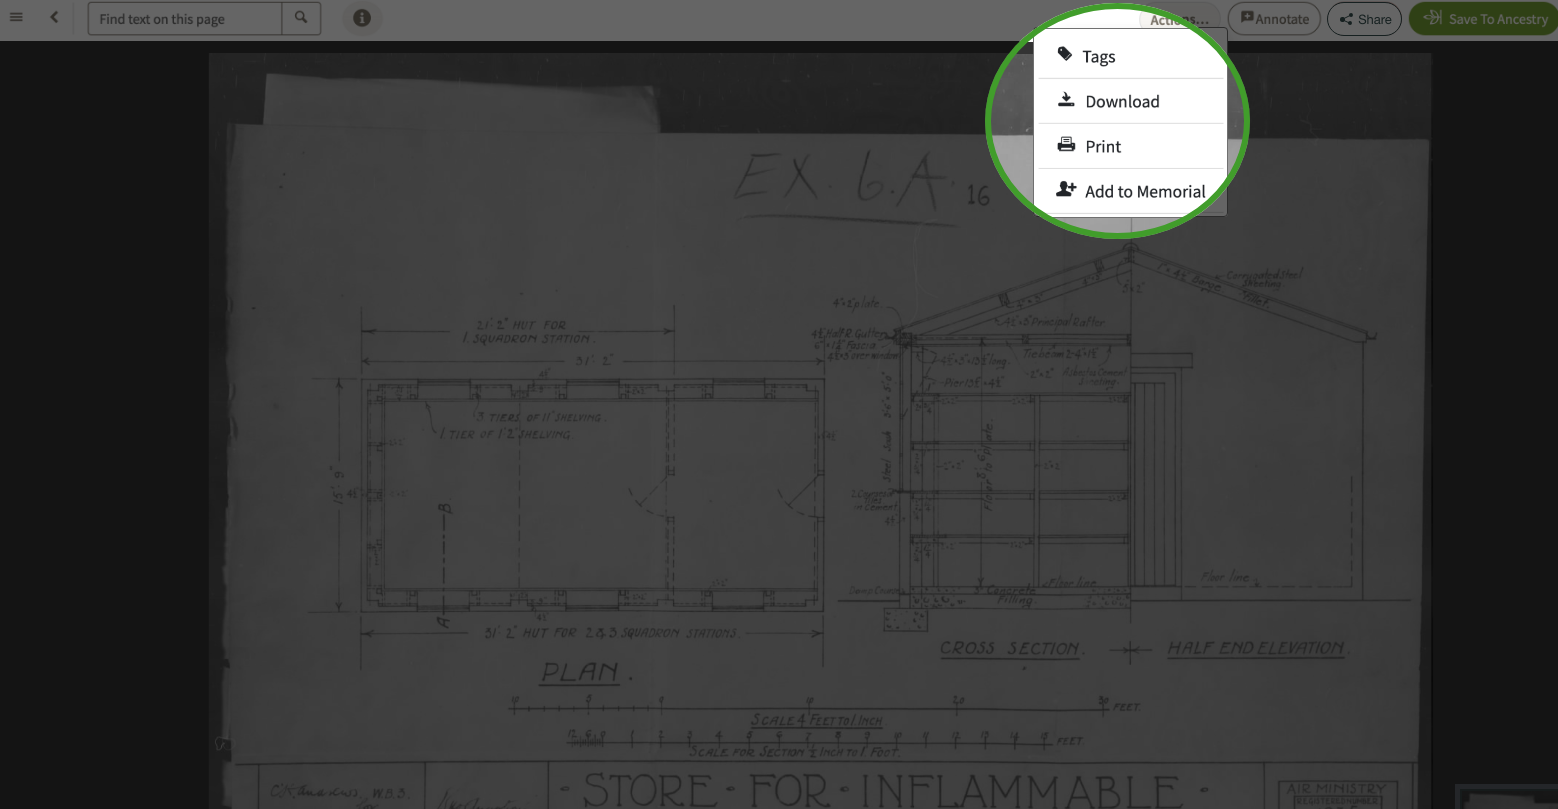
How to Download
· Click on the “Actions” tab and select “Download.”
· Select either a portion of the page or the entire page.
· Select desired format (JPEG or PDF)
How to Print
· Click on the “Actions” tab and select “Print.”
· Select either a portion of the page (by adjusting the text box's perimeters) or the entire page.
· Select “Continue” and Print.
How to Add to a Forces War Records Memorial
· Click on the “Actions” tab and select “Add to Memorial”.
· Choose from "Recently Viewed Memorials", "Bookmarked Memorials", or "My Pages Memorials".
· Choose which Memorial to attach the record to.
· The image is now attached to that Memorial. If you would like to detach the record, click on "Delete".

How To Annotate Records
Adding an annotation to any document or image allows you to generate a link and share the record with anyone, even if they don’t have a Forces War Records subscription. The annotations you create are also searchable on the site.
To annotate, click the + Annotate button and select the type of annotation you’d like to create. You can add a Name, Comment, Date, Place, Military, and more. You can also select "Transcription". This option is helpful when transcribing manuscripts.
After completing your annotation, drag the text box around the portion of the record you’d like to highlight and adjust the perimeters. You can also choose to select the entire image.
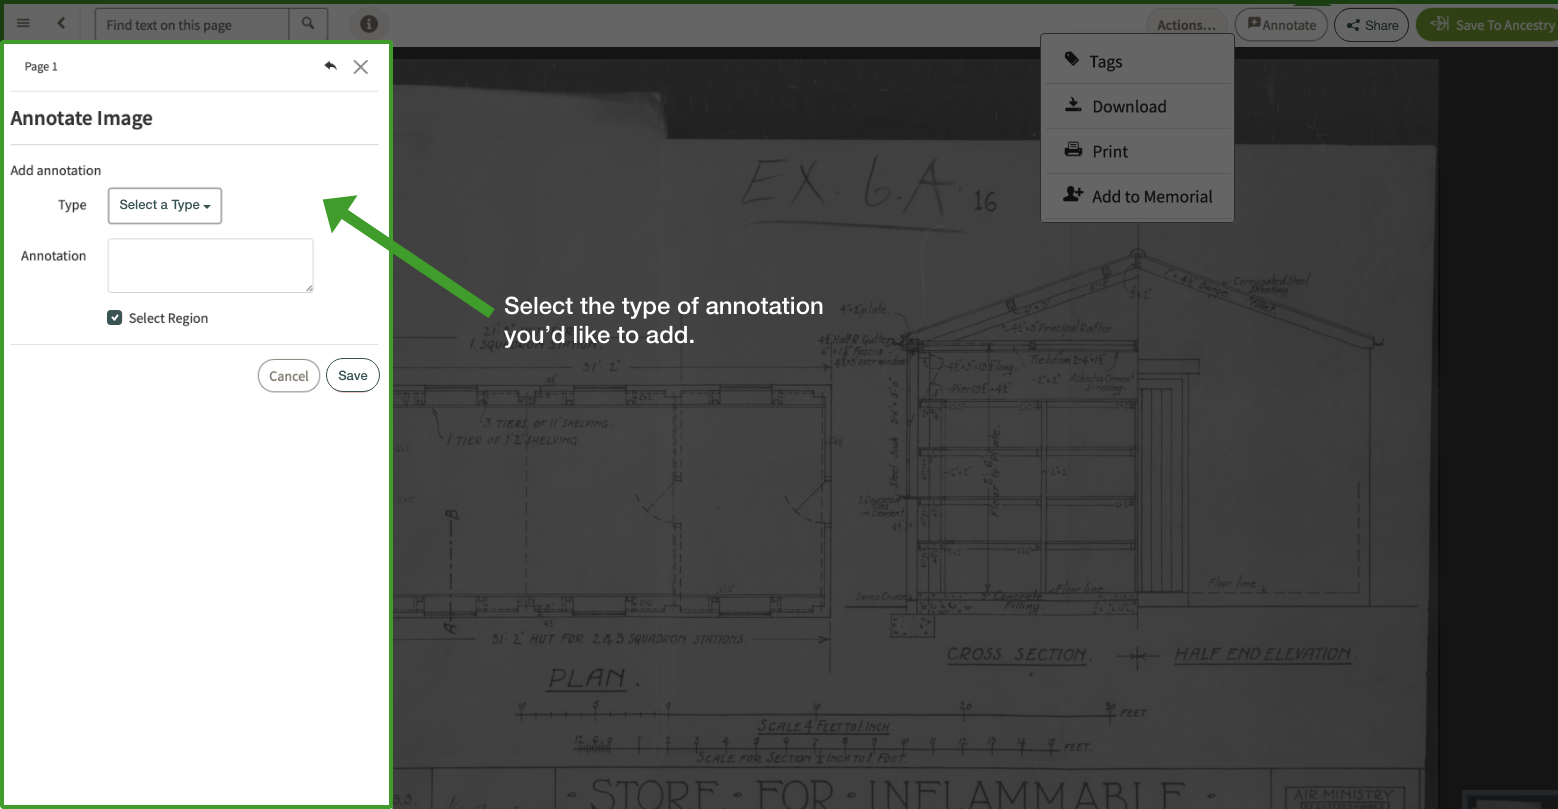
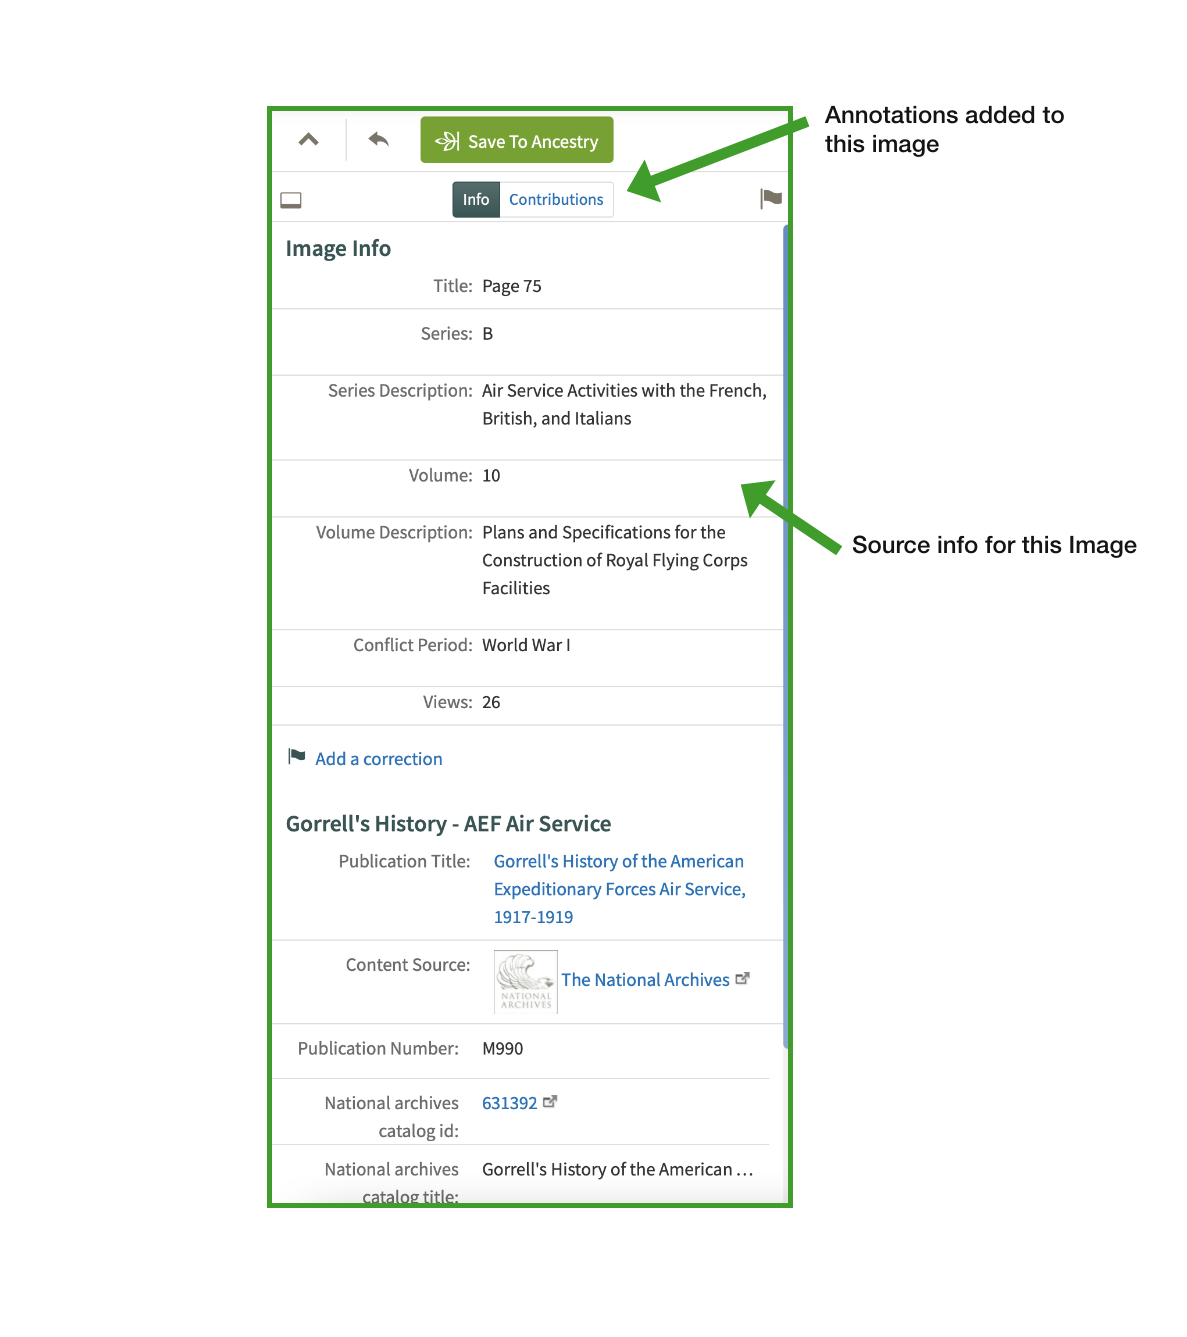
Finally, click "Save". Your annotations are now listed under the Contributions window on the left side of the screen and can be edited and shared.
Save to Ancestry® Tree
· Click on the green "Save to Ancestry" button in the Viewer toolbar.
· Log into Ancestry® (Note: If you are already logged in, you will skip this step).
· Select which Tree and Person you wish to save to.
· Click "Save".